


Photo by fancycrave1 on Pixabay
Windows 11 introduces a fresh, modern interface with improved performance and features. However, it’s not the default option for many devices. Many desktop computers and laptops still come with Windows 10 or even earlier versions.
If you're ready to upgrade your current setup, follow this step-by-step guide to ensure a smooth transition to the new Windows 11 operating system.
Step 1: Check system requirements
Before you trouble yourself on how to get Windows 11, it's crucial to ensure that your computer meets Microsoft's minimum requirements. The Windows 11 operating system introduces new performance, security, and design enhancements, but these improvements also come with stricter software and hardware requirements.
Some older devices may not be compatible, so verifying compatibility beforehand can help you avoid installation issues. Below are the key system requirements your computer must meet to run Windows 11 smoothly:
- Processor: 1 GHz or faster with at least 2 cores (compatible with 64-bit architecture).
- RAM: Minimum 4GB.
- Storage: Minimum 64GB of free disk space.
- TPM (Trusted Platform Module): Version 2.0 required.
- UEFI Secure Boot: Must be enabled.
- Graphics: DirectX 12 compatible with a WDDM 2.0 driver.
- Display: High-definition (720p) display that is at least 9 inches diagonally.
|
Compatibility Check: Use Microsoft’s PC Health Check app to quickly determine if your computer meets the system requirements for Windows 11. This tool provides a detailed compatibility report and highlights any necessary upgrades to ensure a smooth transition. |
Step 2: Backup your files
Before making any significant system changes, it’s essential to back up your important files to prevent data loss. While the upgrade process is generally smooth, unforeseen issues—such as failed installations, compatibility errors, or corrupted files—can sometimes occur.
A proper backup ensures that your personal files and system settings remain safe, allowing you to restore them if needed. Fortunately, Windows provides multiple backup options. Below are the best methods to securely back up your data before upgrading.
- OneDrive: Sync your important files to your Microsoft cloud storage.
- External Drive: Copy files to a USB drive or external hard disk.
- System Image Backup: Create a full system backup using Windows’ built-in tool (Control Panel → Backup and Restore).
Step 3: Ensure your Windows 10 is up to date
Ensure your current installation of Windows 10 is fully updated before upgrading to Windows 11. Keeping your system up to date helps prevent compatibility issues, ensures you have the latest security patches, and can reduce the chances of encountering upgrade errors.
Microsoft periodically releases critical updates that improve system stability and prepare your device for a smoother transition to Windows 11. By checking for and installing any pending updates, you can minimize potential problems and ensure your computer is in the best condition for the upgrade. Here’s how to update your system:
- Go to Start → Settings → Update & Security → Windows Update.
- Click Check for updates and install any available updates.
- Restart your PC when prompted.
Step 4: Download Windows 11
If your PC meets the software and hardware requirements, you can upgrade to Windows 11 using Windows Update or Microsoft's Installation Assistant.
Microsoft provides multiple ways to upgrade, ensuring a smooth installation process whether you're upgrading from Windows Update or using a dedicated tool.
Windows Update
- Open Settings (Win + I).
- Navigate to Update & Security → Windows Update.
- Click Check for updates.
- If Windows 11 is available, click Download and install.
- Follow the on-screen instructions and restart your PC when prompted.
Windows 11 Installation Assistant
If you don’t see the upgrade in Windows Update, you can use Microsoft’s Installation Assistant.
- Download the tool from Microsoft’s official website.
- Run the program and follow the guided installation steps.
- Once you press the install button, your system may restart several times.
|
Clean Installation: To perform a clean installation of Windows 11, download the Media Creation Tool from Microsoft's website, run it to create a bootable USB (8GB minimum), then boot from the USB and follow the installation instructions. |
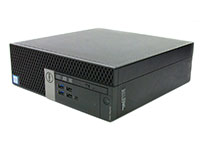
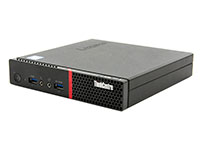
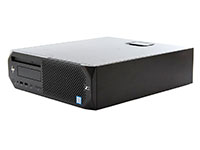
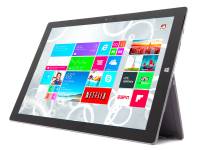
Windows 11-ready laptops
If your current PC doesn’t meet the system requirements for Windows 11, upgrading to a Windows 11-ready computer could be the perfect solution.
Windows 11 computers come equipped with faster processors, improved battery life, and enhanced security features, ensuring optimal performance and longevity. Whether you need a high-performance machine for work, a powerful gaming laptop, or a reliable everyday device, PCLiquidations has a wide range of Windows 11-ready computers designed to meet your needs.
|
16" Touchscreen Laptop i9-13900H - Windows 11 - Grade A |
14" Laptop Core Ultra 5 125U - Windows 11 |
14" Touchscreen Laptop i7-10850H - Windows 11 - Grade A |
|
|
|
|
|
|
|


Step 5: Complete the installation process
As you install Windows 11, your PC will go through several automated steps to get your new operating system up and running. This process ensures that your files, settings, and applications are transferred smoothly while updating your system to the latest version. Follow these steps for a smooth Windows 11 upgrade:
- Allow the update to install: This might take 30 minutes to a few hours.
- Your PC will restart multiple times during the process.
- Log in with your Microsoft account once the installation is complete.
Step 6: Set up Windows 11
After you install Windows 11 successfully, you'll be guided through the initial setup process to personalize your experience and ensure everything is configured correctly. Taking a few minutes to go through these steps will help optimize your new Windows 11 experience immediately.
- Privacy Settings: Adjust your privacy preferences.
- Wi-Fi and Internet Connection: Connect to a stable network.
- Microsoft Account Sign-In: Use your Microsoft account for cloud sync and personalization.
- Customization: Choose themes and wallpapers and configure taskbar settings.
Step 7: Reinstall apps and restore files
Now that your Windows 11 upgrade is complete, it’s time to ensure all your important files and applications are back in place. While most of your data should remain intact, some apps may need to be reinstalled manually. Check the Microsoft Store to download and reinstall apps or perform app feature updates.
Here are some actionable steps:
- Check Installed Apps: Go to Start → Settings → Apps → Installed apps to see which apps carried over.
- Reinstall Missing Programs: Only use the Microsoft Store or the official website of the software provider.
- Reconfigure App Settings: Some apps may require you to adjust preferences, re-enter login credentials, or restore settings after reinstallation
Step 8: Check for new updates
Check for any additional updates to ensure your new operating system is running smoothly and securely.
Microsoft cares about you, whether you are using a used Dell desktop or a new HP laptop. The company frequently releases patches, performance improvements, and security updates after major installations to fix bugs and enhance stability.
To get the best experience, make sure to install any remaining updates as soon as possible. Here’s how to do it:
- Open Settings → Windows Update.
- Click Check for updates and install any remaining updates.
Designed by Windows 11 Creators
For the smoothest, most optimized Windows 11 experience, consider upgrading to a Microsoft laptop, designed by the very creators of Windows 11. There is no need to deal with the headaches of checking hardware requirements or fixing installation errors. These Microsoft devices are built to seamlessly integrate with Windows 11’s latest features, offering exceptional performance, premium build quality, and industry-leading security.
At PCLiquidations, we have powerful refurbished Microsoft machines for productivity, sleek 2-in-1 Microsoft devices, and more, ensuring you get the most out of your Windows 11 experience.
|
14.4" Touchscreen Laptop i7-13800H - Windows 11 |
13.5" Touchscreen 2-in-1 Laptop i7-8650U - Windows 11 - Grade A |
|
|
|
|
|


Step 9: Explore Windows 11 features
Dive into your new setup’s exciting new features. Whether you're a professional working on spreadsheets, a gamer navigating new video game trends, or a casual user enjoying your device for leisure, these features are built to make your experience more intuitive and efficient. Here are some of the standout enhancements you can start exploring today:
- Centered Start Menu and Taskbar for a modern look.
- Snap Layouts & Virtual Desktops for better multitasking.
- Microsoft Teams Integration for easy video calls.
- Widgets for quick access to news, weather, and updates.
- Enhanced gaming features like Auto HDR & DirectStorage.
|
Refurbished Tech Myth: It’s a myth that refurbished products mean compromised quality. These devices undergo rigorous testing and restoration to ensure they meet the original manufacturer’s specifications. They function just as reliably as new devices but are available at a fraction of the cost. |
Get the new version of Windows
Upgrading to Windows 11 is a straightforward process if you follow these steps carefully. Ensure your system meets the requirements, back up your data, and use the correct upgrade method for a seamless experience.
At PCLiquidations, we accommodate all your Windows 11 needs and beyond. We specialize in refurbished computers and accessories, ensuring you have the newest version of Windows at a fraction of the cost. Browse our refurbished laptop selection today and enjoy the new look and features of Windows 11.


